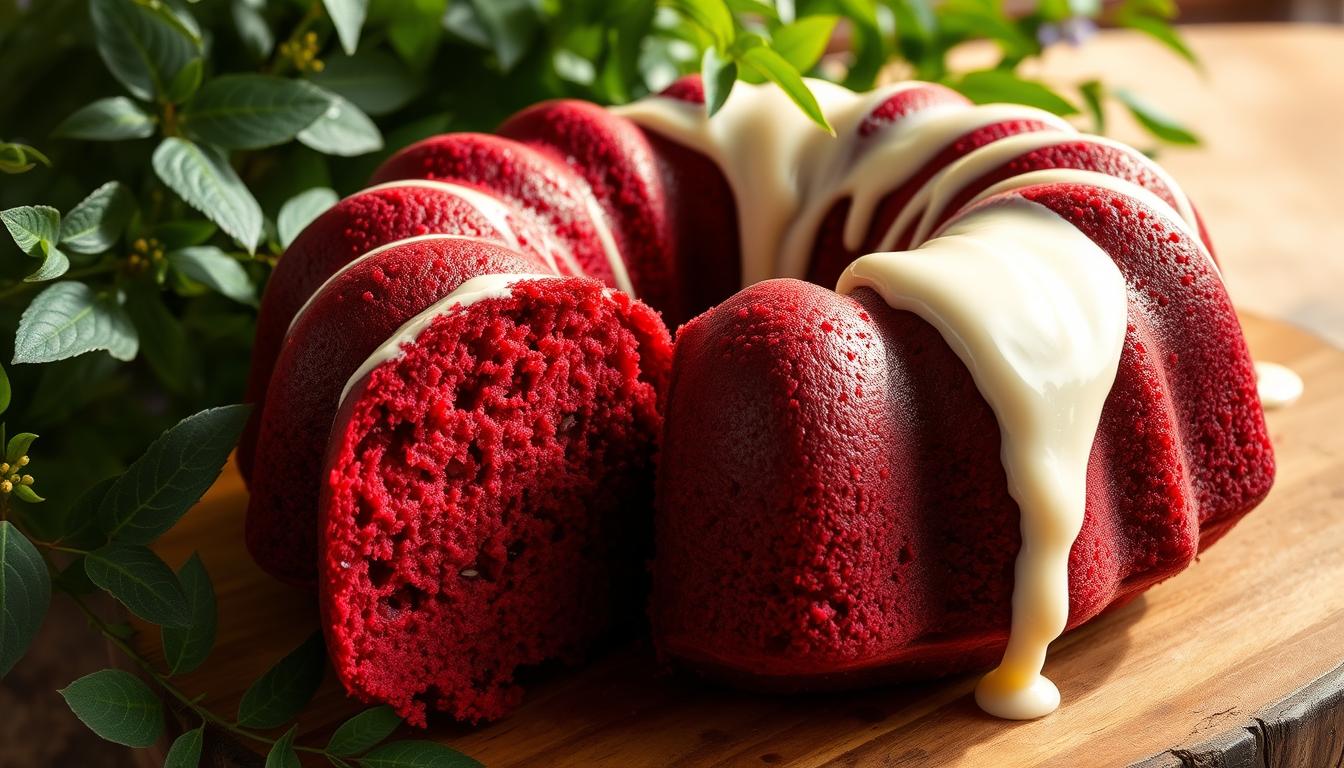
Sunday afternoons in my grandmother’s kitchen were magical. The smell of a red velvet bundt cake baking filled the air. It promised something special was coming from her old oven. These moments sparked my love for making the perfect homemade red velvet cake.
Baking a red velvet bundt cake is more than just following a recipe. It’s about creating a special experience in your kitchen. This guide will help you make a dessert that looks and tastes like it’s from a professional bakery, whether you’re new to baking or experienced.
Starting your journey to making the ultimate red velvet bundt cake is easy. With the right techniques, ingredients, and passion, you’ll soon impress everyone with your dessert.
Key Takeaways
- Learn the art of creating a bakery-quality red velvet bundt cake at home
- Discover professional baking techniques and tips
- Understand the essential ingredients for a perfect red velvet cake
- Master the iconic deep red color and velvety texture
- Gain confidence in your baking skills
The History and Origins of Red Velvet Bundt Cake
Explore the world of red velvet bundt cake, a Southern dessert with a rich history. It’s a mix of tradition and innovation, loved by many in the United States.
Roots in Southern Cuisine
The story of red velvet cake starts in the early 1900s in the American South. Southern desserts were known for their rich flavors and textures. The first red velvet cake was made during the Great Depression. Bakers used beetroot to make the cake look and taste better.
- Originated in Southern kitchens
- Initially created during economic hardship
- Used natural ingredients for color and texture
Bundt Cake Origins Explored
The 1950s saw a big change in home baking with the bundt cake. Nordic Ware created the ring-shaped pan. This design made cakes bake more evenly and look amazing.
| Decade | Cake Evolution | Key Development |
|---|---|---|
| 1940s | Traditional Layer Cakes | Standard Round Pans |
| 1950s | Bundt Cake Introduction | Nordic Ware Pan Invention |
| 1960s | Widespread Bundt Popularity | Home Baking Revolution |
Modern Interpretations and Popularity
Today, red velvet bundt cake is loved everywhere. Bakers try new things and decorate in creative ways. They keep the Southern charm but also appeal to today’s tastes.
- Gourmet bakeries feature unique variations
- Social media showcases creative designs
- Restaurant menus highlight regional interpretations
Essential Ingredients for a Classic Red Velvet Bundt Cake
Making the perfect red velvet bundt cake begins with choosing top-notch ingredients. Your classic red velvet recipe needs a mix of key components. These work together to create a cake that’s rich, velvety, and full of flavor.
The main ingredients for your red velvet bundt cake are:
- Flour: All-purpose flour is the cake’s base
- Cocoa powder: It adds a hint of chocolate
- Buttermilk: It makes the cake moist and tender
- Vinegar: It helps the baking soda work better for a rise
- Red food coloring: It gives the cake its bright red color
Your success in baking depends on accurate measurements and ingredients at room temperature. Make sure your butter, eggs, and buttermilk are at the right temperature. This ensures a batter that’s smooth and a texture that’s consistent.
Professional bakers suggest using high-quality vanilla extract and pure cocoa powder. These ingredients take your classic red velvet recipe to the next level. The right mix turns a simple cake into a rich dessert that will wow your guests.
Kitchen Tools and Equipment You’ll Need
To bake a red velvet bundt cake, you need the right tools. The right equipment makes baking easier and more fun. Let’s look at the key items for a tasty bundt cake.
Choosing the Right Bundt Pan
Finding the perfect bundt cake pan is key. Look for these important features:
- Non-stick surface for easy cake removal
- Sturdy metal construction
- Intricate design for beautiful cake shapes
- Appropriate size (typically 10-12 cup capacity)
Must-Have Mixing Equipment
For cake making, you need precise mixing tools. They help make a smooth batter:
- Stand mixer or hand mixer
- Large mixing bowls
- Rubber spatula
- Measuring cups and spoons
Additional Baking Tools
For a better bundt cake baking experience, consider these tools:
- Cooling rack for proper cake cooling
- Offset spatula for frosting
- Sifter for dry ingredients
- Kitchen scale for precise measurements
Quality baking equipment makes your red velvet bundt cake look and taste amazing.
Step-by-Step Mixing Instructions
Mastering red velvet cake mixing is all about precision and care. The success of your bundt cake depends on how well you prepare the batter. Begin by collecting all ingredients at room temperature. This ensures they blend smoothly.

- Sift dry ingredients together
- Cream butter and sugar until light and fluffy
- Add eggs one at a time
- Incorporate liquid ingredients gradually
- Fold in dry ingredients carefully
When mixing the cake batter, avoid overmixing. Gentle folding preserves the cake’s delicate texture. Mix just until the ingredients are combined. This prevents a tough, dense cake.
| Mixing Technique | Purpose | Tips |
|---|---|---|
| Creaming | Incorporate air | Use room temperature butter |
| Folding | Maintain texture | Use gentle, figure-eight motion |
| Liquid Addition | Ensure even distribution | Add slowly to prevent separation |
Look for a uniform, smooth batter with a vibrant red color. Your cake batter is ready when it looks silky and consistent. Now, it’s time to pour it into your bundt pan.
Mastering the Perfect Red Velvet Color and Texture
Making the perfect red velvet cake is all about color, texture, and taste. You need to know how ingredients mix to get that bright red color and soft cake texture.
To get the right red velvet cake color, pick your food coloring and ingredients wisely. The cake’s look is key, but it also makes the taste memorable.
Natural vs. Artificial Food Coloring
For cake coloring, you can choose between:
- Artificial food coloring: Gives a strong, steady red color
- Natural food coloring: Offers softer colors and is healthier
Achieving the Right Cocoa Balance
The cake’s texture comes from the cocoa you use. Finding the right mix of cocoa powder adds depth without making the cake too heavy.
| Cocoa Type | Color Impact | Flavor Intensity |
|---|---|---|
| Dutch-processed | Darker red | Mild chocolate |
| Natural cocoa | Brighter red | Strong chocolate |
Moisture Control Tips
Keeping the cake moist is key for a great red velvet bundt cake. Here’s how to keep it tender and moist:
- Add buttermilk for tenderness
- Don’t overmix the batter
- Check cake doneness with a toothpick
- Allow cake to cool completely before frosting
With these tips, you’ll make a red velvet bundt cake that looks amazing, tastes great, and has the perfect texture.
Baking Temperature and Timing Guide
Getting the perfect bundt cake baking time and oven temperature is key to a delicious red velvet cake. Knowing the right baking conditions can make your dessert go from good to amazing.
First, preheat your oven. Red velvet bundt cakes need a steady 350°F (175°C). This temperature ensures the cake bakes evenly without burning the outside.
- Preheat oven for 15-20 minutes before baking
- Use an oven thermometer to verify accurate temperature
- Place cake in the center rack for uniform heat distribution
The baking time depends on your recipe and pan size. Usually, a standard red velvet bundt cake takes 45-55 minutes to bake fully.
| Cake Size | Baking Time | Temperature |
|---|---|---|
| 10-inch Bundt Pan | 45-50 minutes | 350°F |
| 12-inch Bundt Pan | 50-55 minutes | 350°F |
To see if the cake is done, stick a toothpick into its center. If it comes out clean with just a few crumbs, it’s ready. Don’t open the oven door too often, as it can mess with the temperature and baking.
Once the cake is out of the oven, let it cool in the pan for 10-15 minutes. Then, move it to a wire rack. This helps the cake keep its shape and avoids any structural problems.
Cream Cheese Frosting and Decorative Finishes
To make your red velvet bundt cake truly special, learn about cream cheese frosting and decorating. The right toppings can turn a simple cake into a stunning centerpiece for any event.
A great cream cheese frosting is your canvas for creativity. It matches the cake’s rich flavor and adds a beautiful finish.
Classic Cream Cheese Frosting Recipe
- 8 oz cream cheese, softened
- 1/2 cup unsalted butter, room temperature
- 4 cups powdered sugar
- 1 tsp vanilla extract
- Pinch of salt
Blend until it’s smooth and creamy. Make sure everything is at room temperature for the best texture.
Glazing and Drizzling Techniques
Try different toppings to make your cake look amazing. Here are some glazing techniques:
- Soft drizzle method
- Thick pour technique
- Artistic zigzag pattern
Garnishing Ideas
Get creative with these garnish ideas to improve your decorating:
| Garnish Type | Flavor Profile | Visual Impact |
|---|---|---|
| Toasted Nuts | Crunchy | Rustic |
| Fresh Berries | Tart | Vibrant |
| Chocolate Shavings | Rich | Elegant |
Being creative and confident is key to making your cake look great. Try new toppings to find your unique style.
Storage Tips and Serving Suggestions
Keeping your red velvet bundt cake fresh is key. After baking, it’s important to store it right to keep its taste and texture. This way, you can enjoy it for a longer time.
For short-term storage, keep it at room temperature. Use an airtight container or plastic wrap to keep it moist. This method keeps your cake fresh for 2-3 days. It’s great for serving guests or enjoying a slice with coffee.
- Refrigeration extends cake freshness up to 5-7 days
- Always use an airtight container when storing
- Let refrigerated cake come to room temperature before serving
Freezing is a good choice for longer storage. Wrap the cake in plastic wrap and then foil. Frozen cakes stay good for up to 3 months.
When serving your red velvet bundt cake, think about these presentation tips:
- Dust with powdered sugar for an elegant touch
- Add fresh berries around the base
- Drizzle with cream cheese glaze
Pro tip for preserving freshness: Always cut slices with a clean, sharp knife. Store the remaining cake right away to prevent moisture loss.
Conclusion
Making a homemade red velvet bundt cake is more than just a recipe. It’s about diving into the art of baking. You’ve learned key techniques to turn simple ingredients into a stunning dessert. This dessert can impress anyone, just like a pro bakery.
Success in baking comes from knowing each step. You’ve learned to pick the best ingredients, mix them right, and make a creamy frosting. Now, you have all you need to make an amazing red velvet bundt cake. Every time you bake, you get better and find your own style.
It’s time to use what you’ve learned. Try new decorations, mix up flavors, and share your cake with friends and family. Your kitchen is now a place for creativity. Each slice of your cake tells a story of hard work and taste.
Are you ready to start baking? Get your bundt pan ready, preheat the oven, and let your love for baking show. Your delicious cake is waiting for you!