Every time I slice into a freshly baked loaf of homemade sourdough, I’m taken back to my grandmother’s kitchen. The warm, tangy aroma fills the room, creating memories that store-bought bread could never capture. Making an easy sourdough bread recipe isn’t just about baking—it’s about connecting with a centuries-old tradition of crafting something truly special with your own hands.
Creating homemade sourdough might seem intimidating, but I promise you it’s simpler than you think. This guide will walk you through each step, transforming mysterious techniques into achievable kitchen magic. From understanding wild yeast to mastering the perfect crust, you’ll discover the joy of baking bread that’s not just food, but an experience.
Whether you’re a curious beginner or a seasoned home baker, this recipe will help you unlock the secrets of incredible sourdough bread. Prepare to embark on a delicious journey that will change how you think about bread forever.
Key Takeaways
- Sourdough bread is easier to make than you might expect
- Homemade bread offers superior flavor and nutrition
- Basic ingredients create extraordinary results
- Patience is the most important ingredient in sourdough baking
- Each loaf tells a unique story of fermentation
Understanding the Magic of Sourdough Bread Making
Sourdough bread making is a blend of science, tradition, and tasty flavors. It’s all about the dance of fermentation and wild yeast. This dance turns simple ingredients into a tangy, complex loaf.
The heart of sourdough bread making is fermentation. Wild yeast in flour and the air team up with good bacteria. Together, they create a special mix that makes sourdough unique.
The Science Behind Natural Fermentation
Natural fermentation makes sourdough bread easier to digest. It involves important biological steps:
- Wild yeast eats the sugars in flour
- Lactic acid bacteria add tangy flavors
- Microorganisms make carbon dioxide for rising
Benefits of Homemade Sourdough
Making sourdough at home has many perks over store-bought bread:
| Benefit | Description |
|---|---|
| Improved Digestibility | Fermentation breaks down gluten and phytic acid |
| Nutritional Value | Increases availability of minerals and nutrients |
| Natural Preservation | Longer shelf life due to fermentation |
Essential Chemistry of Wild Yeast
Wild yeast is more than just a rising agent. It’s a living microorganism that adds depth and complexity to your bread. It works with bacteria to create the unique flavor that makes sourdough special.
By diving into the world of fermentation and wild yeast, you’ll learn how to make delicious, nutritious sourdough bread at home.
Essential Tools and Equipment for Baking Success
Mastering bread baking techniques starts with the right tools. Your sourdough bread making journey begins with gathering key equipment. These tools will turn your kitchen into a professional bakery.
Choosing the right tools is crucial for success in sourdough baking. Here are some must-haves:
- Kitchen Scale: Precise ingredient measurements are critical in bread baking techniques
- Large Mixing Bowls: For combining and kneading ingredients
- Proofing Baskets (Bannetons): Help shape and support dough during rising
- Dutch Oven: Creates perfect crust and traps steam during baking
- Bench Scraper: Assists in dough handling and cutting
- Instant-Read Thermometer: Ensures accurate temperature control
For those on a budget, starting with basic alternatives is okay. A large ceramic bowl can replace specialized proofing baskets. Cast iron skillets are good substitutes if you don’t have a Dutch oven. As you get better, investing in quality tools will improve your bread.
Professional bakers suggest buying tools gradually. Start with the basics and add more as you get better. Choose tools that make your sourdough bread making more consistent and precise.
Creating Your Own Sourdough Starter From Scratch
Making a sourdough starter is a fun journey into natural fermentation. It’s a mix of flour and water that turns into a living ecosystem. This ecosystem is full of wild yeast and good bacteria, changing your baking forever.
Starting a sourdough starter needs patience and attention. It might seem hard, but with the right steps, anyone can make a lively starter. This starter adds depth and flavor to your bread.
Feeding and Maintaining Your Starter
Keeping your sourdough starter healthy means regular feeding and care. Here are the main steps to keep it thriving:
- Use equal parts flour and water by weight
- Feed your starter at the same time daily
- Keep your starter at room temperature
- Discard half the starter before each feeding
Signs of a Healthy Starter
A strong sourdough starter shows clear signs of life. Look for these signs:
- Consistent bubbling throughout the mixture
- Noticeable rise and fall after feeding
- Pleasant, slightly tangy aroma
- Smooth, elastic texture
Troubleshooting Common Starter Issues
Don’t worry if your sourdough starter isn’t perfect at first. Many bakers face challenges. Issues like slow growth or strange smells can be fixed with care and attention.
- Slow growth: Ensure warm environment and fresh ingredients
- Unusual odors: Regular discarding and feeding helps balance
- Lack of bubbles: Check flour quality and room temperature
Your sourdough starter gets better with time. Each batch gets more stable and flavorful as you get better at making it.
Key Ingredients for Perfect Sourdough Bread

Making great artisan bread starts with knowing the key ingredients. These ingredients turn simple parts into a tasty masterpiece. Your sourdough adventure begins with picking top-notch ingredients to improve your baking.
The base of any excellent artisan bread is three main ingredients:
- Flour: The heart of your sourdough, choosing the right flour is key
- Water: More than just a liquid, water affects fermentation and texture
- Salt: Boosts flavor and controls fermentation
Different flour types can greatly change your bread’s taste. Try these flour options:
| Flour Type | Flavor Profile | Protein Content |
|---|---|---|
| Bread Flour | Classic, neutral | 12-14% |
| Whole Wheat | Nutty, robust | 14-16% |
| Rye Flour | Tangy, earthy | 8-10% |
Your water quality is as important as your flour choice. Use filtered or spring water for consistent fermentation. Tap water with lots of chlorine can slow down your starter’s growth.
Salt does more than add taste to your bread. It makes gluten stronger and controls yeast. Use non-iodized sea salt or kosher salt for the best taste.
Easy Sourdough Bread Recipe
Making your own sourdough bread is a fun journey that mixes science and art. It takes patience, practice, and a love for traditional bread making. This guide will show you how to make a tasty homemade loaf that will wow your loved ones.
To make great sourdough, you need to know some key techniques and how to proof bread well. We’ll go through the steps to help you make a perfect loaf every time.
Mixing and Autolyse Process
The first step in making great sourdough is mixing carefully. Start by mixing your flour and water, then let it rest for 30-60 minutes. This step helps the gluten develop and adds flavor.
- Use high-quality bread flour
- Mix ingredients until just combined
- Let the mixture rest at room temperature
Folding and Shaping Techniques
Folding is key to making your dough strong and smooth. Use gentle stretch and fold methods to make the dough elastic. This helps it rise well during proofing.
- Gently stretch dough from each side
- Fold toward the center
- Rotate bowl and repeat 3-4 times
Proofing Times and Temperature Guidelines
| Proofing Stage | Temperature | Duration |
|---|---|---|
| Bulk Fermentation | 70-75°F | 4-6 hours |
| Final Proof | 55-65°F | 12-16 hours |
Knowing how to proof bread is key to getting rich flavors and the right rise. Try different temperatures and times to find what works best for you in this easy sourdough bread recipe.
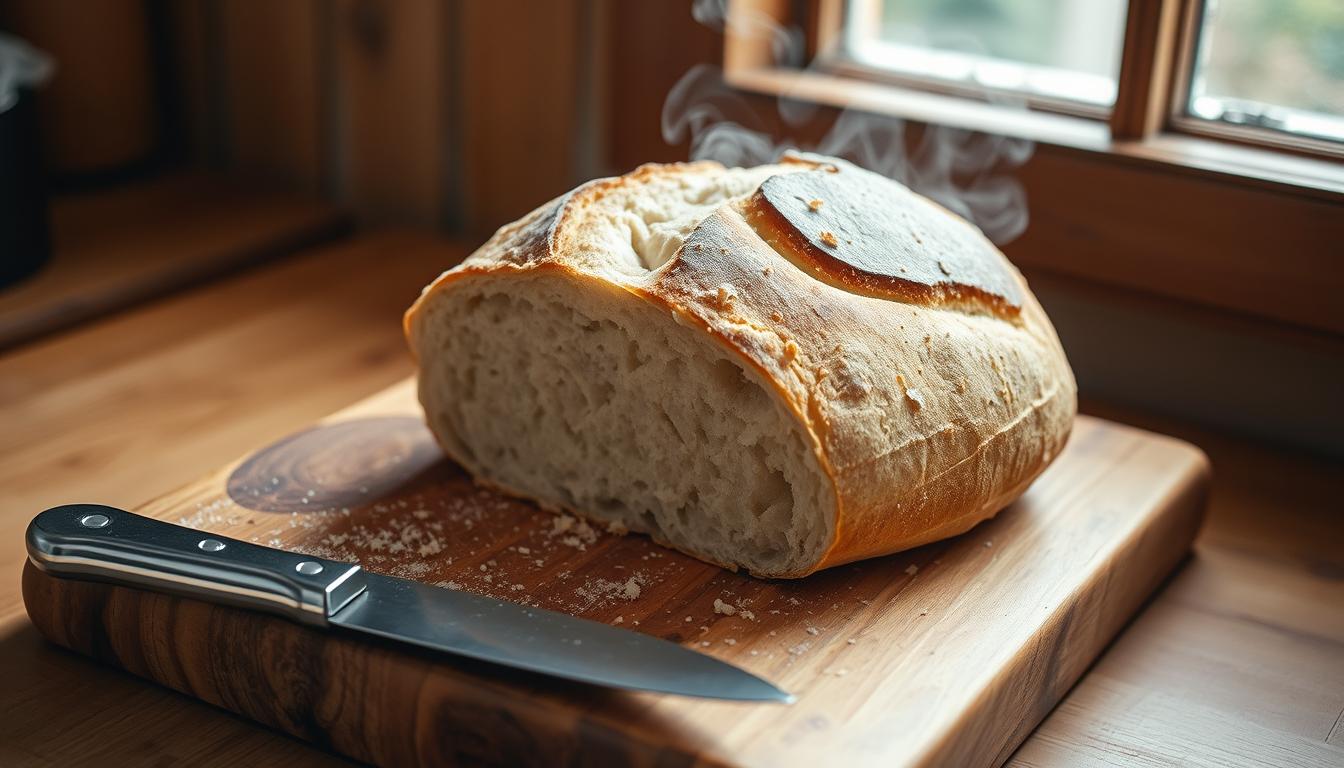
Mastering the Art of Scoring and Baking
Scoring bread is key to making your homemade loaf stand out. By making precise cuts, you let the bread expand during baking. It’s not just about looks; it’s about letting the bread grow.
Scoring bread is an art that requires skill. The right tool is crucial. A sharp lame or razor blade is best for clean cuts.
- Use a sharp, clean blade at a 30-45 degree angle
- Make swift, confident cuts to prevent dragging the dough
- Practice different scoring patterns like simple slashes, wheat stalks, or intricate designs
Each bread type needs its own scoring style. A rustic sourdough might get bold, diagonal slashes. A classic baguette needs parallel cuts. The depth of your cuts affects the bread’s rise in the oven.
Preheat your oven with a baking stone or Dutch oven for better heat. Scoring just before baking helps the bread rise dramatically. This is when it gets that perfect crust.
Pro tip: Dust your blade with flour before scoring to prevent sticking and achieve cleaner cuts.
Tips for Achieving the Perfect Crust and Crumb
Mastering sourdough bread is all about the crust and crumb. Professional bakers know these elements make a great loaf even better.
To make amazing bread, you need to know some key techniques. These techniques affect your bread’s texture and look.
Temperature Control Methods
Temperature is key to your bread’s success. The right baking temperature can make your crust and crumb perfect.
- Preheat your oven to 450-475°F
- Use a baking stone or Dutch oven for consistent heat distribution
- Monitor oven temperature with an accurate thermometer
Steam Generation Techniques
Steam is important for a crispy, golden crust. Bakers use different ways to add moisture during baking.
| Steam Method | Effectiveness | Difficulty Level |
|---|---|---|
| Spray bottle | Moderate | Easy |
| Lava rocks | High | Intermediate |
| Water tray | Good | Easy |
Timing Your Bake Perfectly
Timing is everything in baking sourdough. Look for these signs to know when it’s done:
- Golden brown exterior
- Hollow sound when tapped
- Internal temperature around 200-210°F
With practice, you’ll get better at making the perfect crust and crumb.
Common Mistakes to Avoid in Sourdough Baking

Mastering sourdough baking means knowing what to avoid. Even seasoned bakers face issues that can affect their bread’s quality.
Many home bakers make mistakes that harm their sourdough’s texture and taste. Here are the most common errors to avoid:
- Inconsistent Starter Maintenance: Not caring for your sourdough starter can cause weak fermentation and flat bread. Keep a regular feeding schedule and the right temperature.
- Incorrect Hydration Levels: Wrong water-to-flour ratio can make your dough too dense or too wet. Measure everything carefully and know how hydration affects your bread.
- Impatient Proofing: Hurrying the fermentation process can stop gluten development and flavor formation. Give your dough enough time to rise and develop.
Temperature is key in bread baking. Extreme temperatures can ruin your sourdough. Keep your dough away from drafts and maintain a steady environment during fermentation and proofing.
Managing your oven is also crucial for sourdough success. Wrong baking temperatures or not enough steam can ruin the crust. Use a good baking stone and learn to create steam for a crispy, golden crust.
- Use a reliable kitchen thermometer
- Practice patience during each baking stage
- Learn from each baking experience
Perfecting sourdough baking takes time and practice. Every mistake is a chance to get better and understand this ancient craft better.
Storing and Preserving Your Sourdough Bread
Keeping your sourdough bread fresh is key. It’s important to handle it right to keep its great taste and texture. This way, you can enjoy it for longer.
- Room temperature storage for short-term preservation
- Refrigeration for extended freshness
- Freezing for long-term storage
Best Storage Containers and Methods
The right container is crucial for your sourdough. Look for ones that let air in but keep moisture out. This helps keep your bread fresh.
- Bread box: Ideal for keeping bread at room temperature for 2-3 days
- Paper bags: Good for maintaining crust crispness
- Cloth bread bags: Breathable and prevents moisture buildup
Freezing and Thawing Guidelines
Freezing is great for storing bread for a long time. Wrap it in plastic wrap and then in a freezer bag. This stops freezer burn.
- Remove from freezer and let sit at room temperature
- Unwrap completely to prevent moisture buildup
- Reheat in oven at 350°F for 5-10 minutes to restore crispness
Storing bread doesn’t have to be hard. With these easy steps, you can enjoy your sourdough bread at its best. Whether it’s fresh or saved for later, it’s always delicious.
Variations and Flavor Additions to Try

Adding new flavors to your sourdough can turn a basic bread into a work of art. By trying out different ingredients, you can make sourdough that wows everyone. It’s a great way to impress your loved ones.
Begin your sourdough journey with these exciting mix-ins:
- Savory Sourdough Flavors
- Rosemary and sea salt
- Cracked black pepper and parmesan
- Garlic and herb blend
- Caramelized onion
- Sweet Sourdough Flavors
- Cinnamon raisin
- Dark chocolate and orange zest
- Maple and walnut
- Dried cranberry and pecan
When adding new ingredients, think about adjusting the dough’s moisture. Wet items like herbs or fruits might need a bit more water. Make sure to chop your mix-ins finely and mix them in gently. This helps spread the flavors evenly.
Pro tip: Add dry ingredients like nuts or dried fruits right before shaping. This keeps the dough’s texture perfect while adding amazing flavors.
Troubleshooting Your Sourdough Problems
Homemade sourdough bread can sometimes present challenges even for experienced bakers. Understanding common issues and their solutions will help you create perfect loaves every time.
Fixing Dense or Gummy Bread
Achieving the perfect texture in homemade sourdough requires careful attention to several key factors:
- Ensure your starter is fully active and bubbly before baking
- Check your hydration levels – too much water can create gummy texture
- Allow sufficient time for proper fermentation and proofing
Weak gluten development often leads to dense bread. Stretch and fold techniques can dramatically improve your dough’s structure. Knead or perform gentle folds during the first few hours of fermentation to strengthen the gluten network.
Addressing Spreading and Shaping Issues
Dough spreading instead of rising can frustrate many homemade sourdough enthusiasts. Key solutions include:
- Strengthen dough through proper kneading
- Use a banneton or proofing basket to support shape
- Ensure dough is not over-proofed
Temperature plays a crucial role in sourdough development. Cold environments slow fermentation, while warm spaces accelerate it. Maintain consistent room temperature around 70-75°F for optimal results.
Conclusion
Making easy sourdough bread is more than baking. It’s an art that connects you to centuries of cooking traditions. Your sourdough journey mixes science, patience, and creativity. Each loaf you make shares a story of fermentation, skill, and passion.
Learning sourdough techniques might seem tough at first. But with practice, you’ll get to know your starter and dough well. Remember, every baker starts somewhere. Imperfect loaves are just steps to mastering your recipe. Your kitchen turns into a place for tasty experiments.
Enjoy the learning process and every part of your sourdough adventure. Whether it’s a rustic loaf for brunch or trying new flavors, your bread will make you happy. Share your bread with others and keep trying new things as you get more confident.
Begin your sourdough journey today. Your taste buds and those around you will thank you for the fresh, delicious bread from your oven. Happy baking!