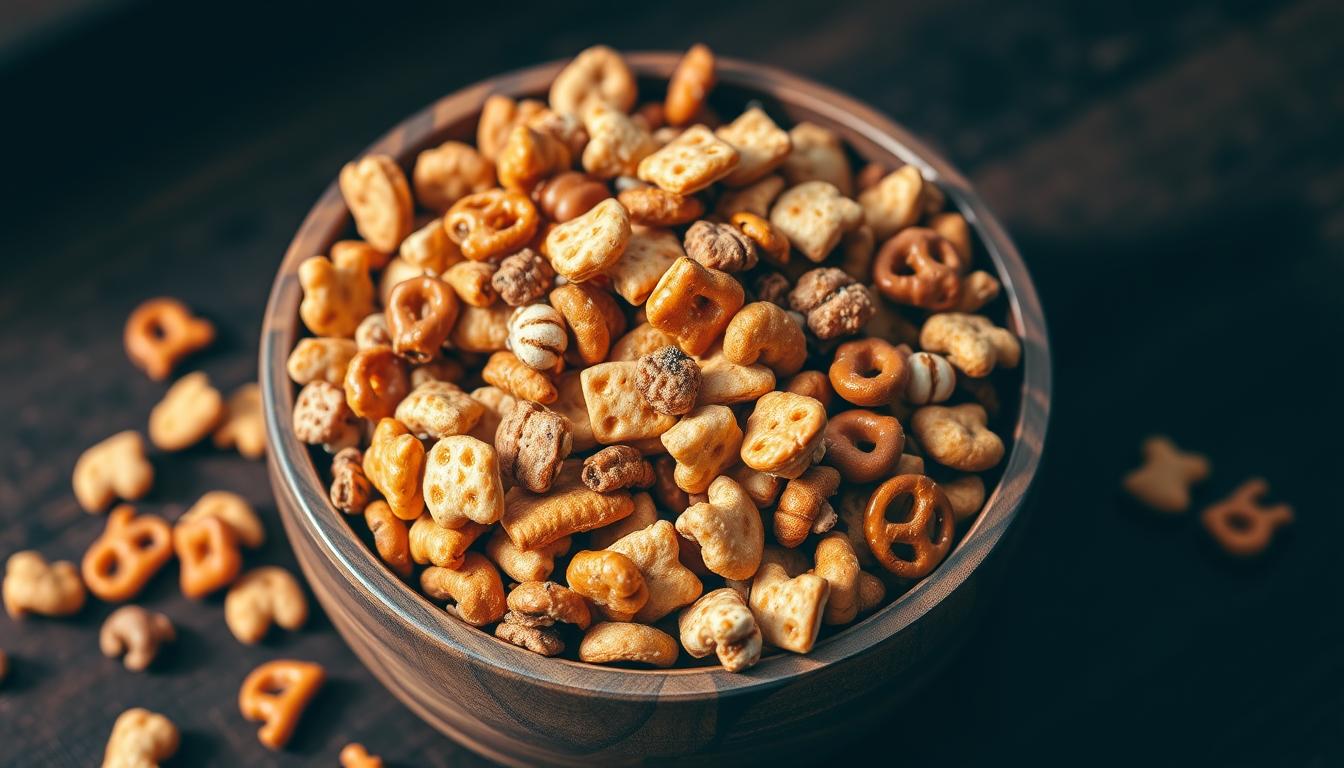
Looking for a tasty homemade snack that’s quick to make? This homemade Chex mix recipe is perfect. It’s a crowd-pleaser with a great mix of crunch, flavor, and satisfaction.
Need a snack for a game night, a quick treat for kids, or something tasty for yourself? This Chex mix is your new favorite recipe. You’ll see how easy it is to make a snack that tastes like it came from a restaurant.
Forget about store-bought Chex mix. Making your own lets you choose the ingredients and flavors. You’ll get a fresher, tastier snack. Get ready to elevate your snack game with this simple and versatile recipe.
Key Takeaways
- Super quick and easy to prepare
- Customizable flavor options
- Perfect for gatherings and snacking
- Budget-friendly homemade treat
- Healthier alternative to store-bought mixes
Why This Classic Chex Mix Recipe Is a Must-Try
Every kitchen needs a snack that brings people together. Classic Chex mix is a favorite for this reason. It has a rich history and offers many benefits for home cooks.
History of the Beloved Snack Mix
The classic Chex mix started in the 1950s. It quickly became a favorite in American homes. Ralston Purina first shared the recipe on Chex cereal boxes, making it a hit.
- 1952: First Chex mix recipe appeared
- 1960s: Popularity spread across family gatherings
- 1990s: Commercial packaged versions hit store shelves
Benefits of Making Homemade Chex Mix
Making homemade Chex mix has many advantages. Your kitchen becomes a place where you can experiment with flavors. You have full control over every ingredient.
| Benefit | Description |
|---|---|
| Cost-Effective | Significantly cheaper than pre-packaged options |
| Customization | Adjust seasonings and ingredients to personal taste |
| Freshness | Enjoy crisp, warm snacks straight from your oven |
Homemade snacks offer more than just taste. You can control what goes into your Chex mix. This means you can avoid preservatives and make a healthier snack.
Essential Ingredients for Perfect Chex Mix
Making the perfect Chex mix starts with picking the right ingredients. Your snack will stand out with high-quality parts that enhance flavors and textures.

The base of a great Chex mix is the cereals. Wheat Chex, Rice Chex, and Corn Chex are top picks. They offer a solid base for your mix.
- Cereals: Wheat, Rice, and Corn Chex
- Nuts: Mixed nuts or specific varieties like almonds and cashews
- Pretzels: Small twists or sticks
- Seasonings: Worcestershire sauce, garlic powder, seasoned salt
Choosing the right ingredients can turn a simple snack into a hit. Quality matters when picking each part for your Chex mix.
| Ingredient Category | Recommended Options | Flavor Profile |
|---|---|---|
| Cereals | Corn Chex, Rice Chex, Wheat Chex | Crunchy, neutral base |
| Nuts | Almonds, Cashews, Peanuts | Rich, savory depth |
| Salty Additions | Pretzels, Bagel Chips | Extra crunch and salt |
Pro tip: Always use fresh ingredients for the best Chex mix. Old cereals or nuts can ruin the taste and texture.
Kitchen Tools and Equipment Needed
To make Chex Mix, you’ll need some basic kitchen tools. These tools make preparing large batches easy and ensure your snack is crispy and tasty.
- Large mixing bowl
- Measuring cups and spoons
- Baking sheet with raised edges
- Wooden spoon or spatula
- Oven mitts
For bigger batches of Chex Mix, some extra equipment can help a lot.
Optional Equipment for Larger Batches
For large batches, consider these tools:
- Commercial-size baking sheets
- Multiple baking sheets for simultaneous cooking
- Industrial-size mixing bowls
- Cooling racks
Storage Container Recommendations
Keeping Chex Mix crispy is key. Here are some great storage options:
| Container Type | Pros | Best For |
|---|---|---|
| Airtight Glass Containers | Preserves crispness, looks elegant | Home storage, gifting |
| Plastic Snap-lid Containers | Lightweight, portable | Parties, picnics |
| Mason Jars | Charming presentation, good seal | Small batches, gifts |
Choosing the right tools can make a big difference in making Chex Mix. Invest in quality to get delicious results every time.
Basic Chex Mix Recipe Step-by-Step

Making your own Chex mix is easier than you think. This guide will show you how to make a tasty homemade snack that everyone will enjoy.
First, let’s look at the main ingredients you’ll need for this classic snack mix:
- 3 cups Corn Chex cereal
- 3 cups Wheat Chex cereal
- 1 cup mixed nuts
- 1 cup small pretzels
- 1/2 cup butter
- 2 tablespoons Worcestershire sauce
- 1 1/2 teaspoons seasoned salt
- 3/4 teaspoon garlic powder
Here are the simple steps to make your Chex mix:
- Preheat your oven to 250°F (120°C)
- Melt butter in a large roasting pan
- Mix Worcestershire sauce and seasonings into melted butter
- Add Chex cereals, nuts, and pretzels to the pan
- Gently stir to coat all ingredients evenly
- Bake for 1 hour, stirring every 15 minutes
- Remove from oven and let cool completely
Pro tip: For the best results, mix ingredients in a large bowl before baking. This way, every bite will be full of flavor in your homemade Chex mix.
The whole process takes about 1 hour and 15 minutes. Most of that time is spent baking, letting your kitchen fill with a delicious smell. You’ll know a tasty snack is coming!
Flavor Variations and Add-ins
Exploring new chex mix flavors can make your snack go from good to great. This classic mix is super versatile. It lets you try out sweet and spicy mixes that you’ll love.
Creating your own mix lets you make it just how you like it. Want something sweet or a little spicy? There are endless ways to make this snack your own.
Sweet Options for Chex Mix
Sweet chex mix is a tasty twist on the classic. Here are some yummy ideas:
- Chocolate Lovers Chex Mix: Drizzle melted chocolate and sprinkle cocoa powder
- Caramel Delight: Add caramel chips and a light dusting of sea salt
- Cinnamon Sugar Chex Mix: Coat with cinnamon and powdered sugar
Spicy Alternatives
For a spicy kick, try these chex mix options:
- Sriracha Lime Chex Mix
- Jalapeño Cheddar Blend
- Chipotle Chili Pepper Mix
Regional Flavor Combinations
| Region | Flavor Profile | Key Ingredients |
|---|---|---|
| Southwest | Spicy and Tangy | Chili powder, cumin, lime zest |
| Mediterranean | Herbal and Zesty | Oregano, garlic powder, olive oil |
| Asian-Inspired | Sweet and Savory | Sesame oil, soy sauce, ginger |
Make your chex mix a fun journey. Use these ideas as a starting point. Let your imagination run wild to find your favorite mix.
Storage Tips and Shelf Life
To keep your homemade Chex Mix fresh, use smart storage tips. The right storage keeps it crunchy for longer. It’s all about understanding how storage affects its quality.
For storing Chex Mix, pick airtight containers that seal well. Plastic containers with tight lids are best. They keep the mix crisp and prevent moisture from making it soggy.
- Room temperature storage: 1-2 weeks in sealed container
- Refrigerator storage: Up to 3 weeks
- Freezer storage: Can last up to 1 month
The shelf life of your snack mix depends on several things. Ingredients like pretzels and nuts affect freshness. Pro tip: Store it in a cool, dry place, away from sunlight to keep it crunchy.
Different ingredients last longer or shorter. Nuts might get stale faster, while cereal stays crunchy longer. Look for staleness signs like soft texture or odd smells. It’s time for a new batch then.
| Storage Location | Expected Freshness |
|---|---|
| Pantry (Airtight Container) | 7-10 days |
| Refrigerator | 2-3 weeks |
| Freezer | 4-6 weeks |
Homemade Chex Mix doesn’t have preservatives, so storing it right is key. Always rotate your stock, use clean utensils, and seal containers after use. This keeps it fresh for longer.
Common Mistakes to Avoid
Making homemade snacks like Chex Mix needs focus and practice. Many people face problems that can spoil their snack. Knowing common mistakes helps make perfect Chex Mix every time.
Start by spotting potential problems early. Being proactive and knowing common mistakes is key.
Temperature Control Challenges
Oven temperature is key for Chex Mix. Bad heat can cause many issues:
- Burning edges while leaving center pieces undercooked
- Uneven toasting of ingredients
- Moisture retention that creates soggy mix
To avoid these, use an oven thermometer for accurate heat. Stir the mix every 15 minutes while baking.
Seasoning Distribution Difficulties
Getting even flavor in Chex Mix is a challenge. Uneven seasoning can make bites taste bland or too salty.
- Mix seasonings well before adding to ingredients
- Use a big mixing bowl to coat every piece
- Toss gently but completely for even coverage
Pro tip: Spread seasoned mix in a single layer on baking sheets. This ensures even flavor and crispness.
Make-Ahead and Party Planning Tips
Planning a party or event needs smart snack prep. Chex mix is a great choice. It can be made ahead, making your event stress-free and tasty.
Preparing Chex mix early saves time during setup. Here are some tips for party snack prep:
- Make Chex mix up to 5 days before your event
- Store in airtight containers to maintain crispness
- Create multiple flavor variations to suit different tastes
- Package in individual serving bags for easy distribution
Scaling Chex mix for big crowds is easy with these tips:
- Double or triple your base recipe
- Use large commercial baking sheets
- Mix ingredients in batches to ensure even seasoning
- Prepare multiple flavor profiles
Customize Chex mix for themed events. It’s perfect for game days, holidays, or corporate events. Your guests will love the homemade touch and flavors.
Pro tip: Always make a test batch before your main event. This ensures your Chex mix will be a hit every time.
Conclusion
Making Chex Mix at home is more than just tasty. It lets you pick what goes in, change flavors, and make a snack that’s better than store-bought. The recipe we shared is easy to follow and makes a snack that will wow your loved ones.
Trying out different seasonings and add-ins is fun. You can make it sweet, savory, or spicy. This recipe lets you show off your cooking skills and make a snack that’s all you.
Don’t worry if your first batch isn’t perfect. Every time you make Chex Mix, you’ll get better and find new flavors. Feel free to try new things and make it your own.
Now, you’re set to be the snack star at home. With these tips, you can make a snack that everyone will love. Enjoy making and sharing your delicious creations!