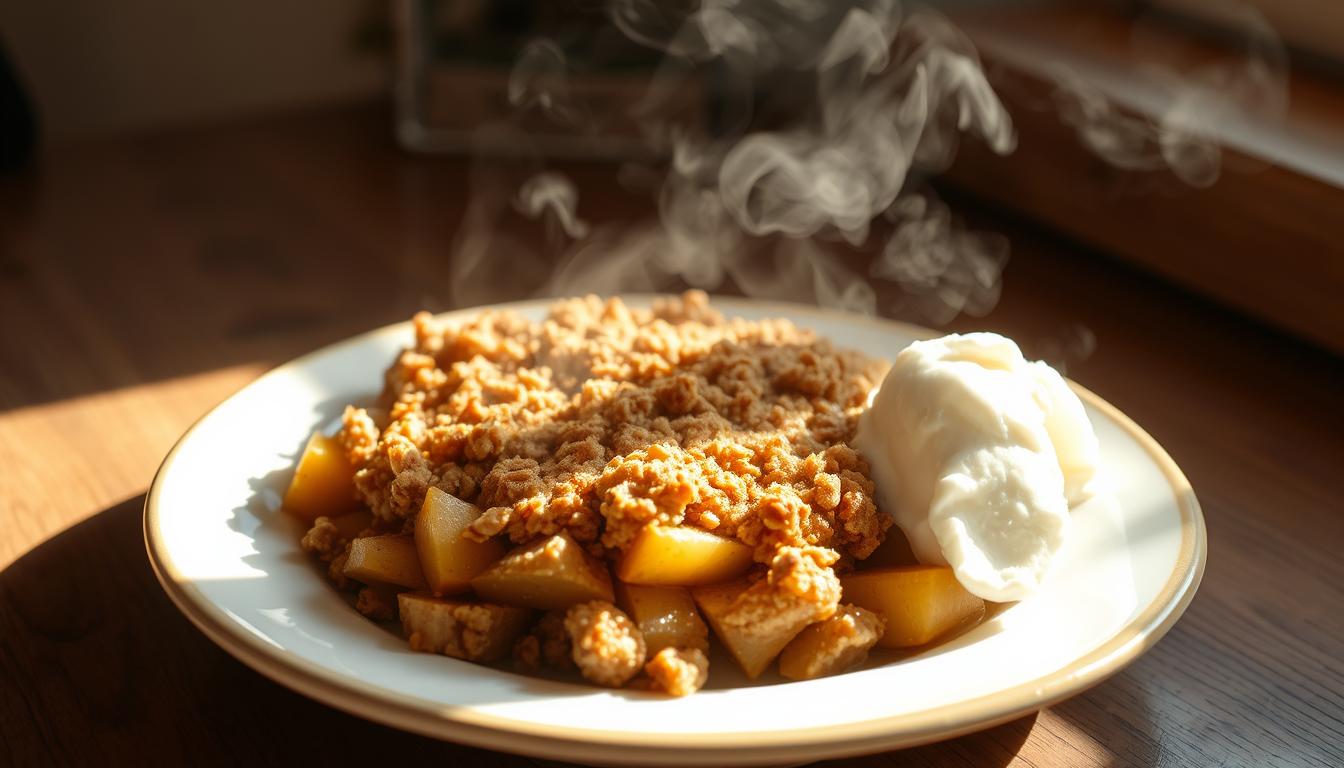
Growing up in a small farmhouse kitchen, the smell of apple crisp was always a sign of comfort and love. My grandmother would slice apples with care, turning simple ingredients into a dessert that warmed our hearts. Today, I’m excited to share this classic homemade apple crisp recipe that brings that same warmth to your table.
An apple crisp recipe is more than baking—it’s about making memories. With a little effort, you can make a dessert that touches the soul. Whether you’re impressing family or treating yourself, this easy apple crisp promises comfort in every bite.
Key Takeaways
- Apple crisp is a simple, comforting dessert perfect for any occasion
- Minimal ingredients create maximum flavor
- Homemade apple crisp beats store-bought every time
- Great for using seasonal, fresh apples
- Can be prepared quickly with basic kitchen tools
What Makes Apple Crisp a Perfect Dessert
Apple crisp is a classic American dessert that warms hearts and brings back cherished memories. It’s a simple yet delightful mix of tender apples and a crispy topping. This combination has made it a favorite across generations.
The history of apple crisp shows a rich tradition that connects families. It’s a comforting dish that brings people together.
The Origins of a Comfort Classic
The history of apple crisp goes back to early American settlers. They needed creative ways to use the many apples they had. In rural kitchens, cooks turned simple ingredients into hearty desserts for large families.
These cooks made a recipe that was both affordable and tasty. It was a smart way to use up apples.
- Originated in early 19th-century American kitchens
- Developed as a practical way to use surplus apples
- Evolved from traditional European fruit dessert techniques
Why Apple Crisp Captures Hearts
Apple crisp is loved for its versatility and nostalgic charm. It’s perfect with vanilla ice cream or as a cozy afternoon treat. This dessert brings people together through shared cooking experiences.
Its easy preparation makes it a favorite among home cooks. It’s great with different apple types and offers a perfect mix of textures.
- Easy to prepare for home cooks
- Adaptable to different apple varieties
- Provides a perfect balance of textures
Apple crisp’s lasting appeal is its ability to turn simple ingredients into a memorable dessert. It feels like a warm hug from grandma’s kitchen.
Essential Ingredients for Your Apple Crisp
Making a delicious apple crisp starts with picking the right ingredients. You’ll learn how each part works together to make a tasty treat.
For the apple filling, you’ll need these key items:
- Fresh apples (5-6 medium-sized)
- Granulated sugar
- Ground cinnamon
- Lemon juice
- Pinch of salt
The topping is where the magic happens. It turns a simple fruit dish into a favorite dessert.
Your crisp topping needs:
- Old-fashioned rolled oats
- All-purpose flour
- Brown sugar
- Cold butter
- Ground cinnamon
Pro tip: Cold butter is key. Mix the topping until it’s coarse crumbs. This makes the top crunchy and perfect with the soft apples.
Every ingredient is important for flavor and texture. Together, they make apple crisp a hit. The mix of sweet apples, spices, and buttery topping is a treat for your taste buds.
Choosing the Best Apples for Your Crisp
Choosing the right apples for your apple crisp is key. Not all apples are the same when it comes to baking. The type of apple you pick will affect the crisp’s texture, taste, and success.
The best apples for apple crisp have a sweet and tart taste. They should stay firm but still soften a bit during baking. This way, they create a tasty filling.
Sweet vs. Tart Apple Varieties
Here are some top apple varieties for baking:
- Granny Smith: Tart and firm, perfect for adding a bright flavor
- Honeycrisp: Sweet with a crisp texture that holds up well
- Braeburn: Offers a balanced sweet-tart profile
- Golden Delicious: Soft and sweet, great for a smooth filling
Seasonal Apple Selection Guide
Fall is the best time for apple varieties. Local farmers markets have fresh apples perfect for baking.
Storage and Preparation Tips
Keep your apples cool and dark. Wash and dry them before use. You can peel them or leave the skin on for extra texture and nutrition.
Pro tip: Mix two or three apple varieties for a richer flavor in your dessert.
Kitchen Tools You’ll Need
Preparing a delicious apple crisp needs some key kitchen tools. The right tools make baking smooth and fun. Let’s look at the essential kitchen equipment for apple crisp to make a perfect dessert.
Before baking, get these important tools for a delightful apple crisp:
- 9×13 inch Baking Dish: The perfect size for a classic apple crisp recipe
- Large Mixing Bowls: For making apple filling and crumb topping
- Sharp Chef’s Knife: For cutting apples precisely
- Apple Peeler/Corer: Makes apple prep faster
- Measuring Cups and Spoons: For accurate ingredient amounts
Professional bakers suggest good kitchen equipment for apple crisp. While special tools are nice, many standard items work great.
| Tool | Purpose | Recommended Type |
|---|---|---|
| Baking Dish | Even heat distribution | Ceramic or glass |
| Mixing Bowls | Ingredient preparation | Stainless steel or ceramic |
| Apple Peeler | Quick apple preparation | Handheld or manual rotary |
You don’t need fancy or expensive tools for a great apple crisp. Most home cooks already have these tools. The main thing is to use what you have and enjoy baking!
Step-by-Step Apple Crisp Preparation
Making apple crisp is simpler than you think. It uses basic ingredients and a simple cooking method. You’ll soon make a dessert that will wow your loved ones.
To bake a great apple crisp, focus on the details and a few key steps. We’ll guide you through each step. This way, your dessert will be golden and tasty.
Preparing the Apple Filling
First, pick the right apples for your crisp. You need to:
- Wash and peel 6-8 medium-sized apples
- Core and slice apples into uniform 1/4-inch thick pieces
- Toss apple slices with cinnamon, sugar, and a splash of lemon juice
- Let the mixture sit for 10 minutes to develop flavor
Making the Perfect Crumb Topping
The key to a great apple crisp is its crispy topping. To make it, mix:
- Flour, brown sugar, and rolled oats
- Cold butter into the dry ingredients
- Until it’s like coarse breadcrumbs
Assembly and Baking Instructions
To finish your apple crisp, follow these steps:
- Preheat the oven to 375°F
- Put the apple filling in a 9×13 inch baking dish
- Sprinkle the crumb topping over the apples
- Bake for 40-45 minutes until golden
- Let cool for 15 minutes before serving
Your apple crisp is ready to enjoy! Serve it warm with vanilla ice cream for the best dessert.
Tips for the Perfect Crispy Topping

Making a crispy apple crisp topping is an art. It turns a simple dessert into a memorable treat. The secret to a perfect topping is knowing the right techniques and ingredients.
Your crispy apple crisp topping needs a few key things. Start with top-notch ingredients that go well with the apples. Cold butter is key for those crumbly, crisp layers that make apple crisp so good.
- Use cold, unsalted butter cut into small cubes
- Mix dry ingredients thoroughly before adding butter
- Avoid overworking the topping mixture
- Ensure even distribution across the apple filling
Texture is everything in making the perfect topping. Oats are crucial for a crunchy, golden-brown surface. Mix them with flour, brown sugar, and a bit of salt for flavor and texture.
| Ingredient | Purpose | Recommended Amount |
|---|---|---|
| Old-fashioned oats | Adds crunch and texture | 1 cup |
| All-purpose flour | Provides structure | 3/4 cup |
| Brown sugar | Adds sweetness and caramelization | 1/2 cup |
Baking temperature and technique are key for a crispy topping. Use a 375°F oven and bake until the top is golden brown. The filling should bubble around the edges. This usually takes 35-45 minutes.
Pro tip: Let your apple crisp rest for 15-20 minutes after baking. This cooling time helps the topping set and become extra crispy. It makes the apple crisp texture even better.
Serving Suggestions and Pairings
Make your apple crisp special with creative serving ideas. These ideas can turn a simple dessert into a memorable treat. Your apple crisp pairings can delight all your senses.
Temperature and presentation are key when serving apple crisp. Serve it warm for the best experience. This lets the flavors shine and the topping stay crunchy.
Popular Toppings and Accompaniments
Try these delicious toppings to enhance your apple crisp:
- Vanilla bean ice cream
- Fresh whipped cream
- Caramel drizzle
- Chopped toasted nuts
- Cinnamon dusting
Temperature and Timing Recommendations
Serve your apple crisp within 30 minutes of baking. The best temperature is between 140-160°F. This ensures a warm, comforting dessert that’s perfect for melting in your mouth.
Apple crisp pairings go beyond toppings. Here are some drink options:
- Hot beverages: Chai tea, coffee, or mulled cider
- Cold drinks: Vanilla milkshake or bourbon-spiked apple cider
Reheat leftover apple crisp in a 350°F oven for 10-15 minutes. This will restore its crispy texture and warm aroma.
Storage and Reheating Guidelines
Learning how to store apple crisp properly can help you enjoy this delicious dessert for several days after baking. Your leftover apple crisp can remain fresh and tasty with the right storage techniques.
For refrigerating your apple crisp, follow these key steps:
- Allow the dessert to cool completely at room temperature
- Cover the baking dish with aluminum foil or plastic wrap
- Store in the refrigerator for up to 4-5 days
When it comes to reheating apple crisp, you have two primary methods to restore its original warm, crispy texture:
- Oven Method:
- Preheat oven to 350°F
- Remove crisp from refrigerator 15 minutes before reheating
- Cover with foil to prevent burning
- Warm for 15-20 minutes until heated through
- Microwave Method:
- Use microwave-safe dish
- Heat in 30-second intervals
- Check temperature between intervals
- Avoid overheating to maintain crisp topping
For long-term storage, you can freeze your apple crisp. Wrap the dish tightly in plastic wrap and aluminum foil. When ready to enjoy, thaw in the refrigerator overnight and reheat using the oven method for best results.
Variations on Classic Apple Crisp
Exploring apple crisp variations can turn your classic dessert into a fun adventure. You can make it fit dietary needs or just try new tastes. There are many ways to make this beloved treat your own.
Every home baker can make their own version of apple crisp. This dessert is great because it can change to fit different tastes and needs.
Creating Delicious Gluten-Free Apple Crisp
Making a gluten-free apple crisp doesn’t mean losing flavor or texture. You can make a tasty gluten-free version with special ingredients:
- Almond flour as a base for the crumb topping
- Gluten-free oats for added crunch
- Coconut flour as a binding agent
- Certified gluten-free baking mix
The secret to a great gluten-free apple crisp is getting the texture and taste right. Try different gluten-free flour mixes to find your favorite.
Seasonal Flavor Adaptations
Apple crisp gets even more fun with seasonal twists. Try these creative ideas:
- Autumn Spice Blend: Add cinnamon, nutmeg, and cardamom
- Summer Berry Fusion: Mix in fresh berries like raspberries or blackberries
- Winter Nut Crunch: Sprinkle chopped pecans or walnuts on top
- Spring Citrus Twist: Incorporate orange or lemon zest
These apple crisp variations let you enjoy a classic dessert in new ways all year. Your gluten-free apple crisp can be a blank canvas for your creativity.
Common Troubleshooting Tips

Running into apple crisp problems can be really frustrating. But, with the right tips, you can fix most issues easily. Let’s look at some common problems and how to solve them.
Soggy Bottom and Texture Troubles
A soggy apple crisp bottom can really mess up your dessert. Here are some tips to avoid this:
- Use firmer apple varieties like Granny Smith or Honeycrisp
- Pat apple slices dry before mixing with sugar
- Pre-cook apple filling slightly to reduce excess moisture
Topping and Flavor Challenges
Getting the perfect crisp topping is all about paying attention to details. Here are some solutions for common apple crisp problems:
| Issue | Solution |
|---|---|
| Burnt Topping | Cover with aluminum foil halfway through baking |
| Soft Crumb Topping | Add extra cold butter and refrigerate before baking |
| Overly Sweet Filling | Use tart apples and reduce sugar quantity |
Remember, the more you bake, the better you get. Each try helps you learn more about your oven and ingredients.
Pro Tips for Apple Crisp Success
- Always use room temperature ingredients
- Slice apples uniformly for even cooking
- Let the crisp rest for 15-20 minutes after baking
With these tips, you’ll make apple crisp that will wow everyone. It’s a sure hit with family and friends.
Conclusion
Making an easy apple crisp recipe at home is more than baking. It’s about creating memories in your kitchen. This homemade dessert brings warmth, comfort, and delightful flavors. It connects generations through a simple yet incredible treat.
Your apple crisp journey doesn’t end with one recipe. Each time you bake, you’ll discover new techniques. You’ll experiment with different apple varieties and develop your unique twist on this classic dessert. The beauty of an easy apple crisp recipe lies in its flexibility and ability to adapt to your personal taste preferences.
We invite you to embrace the joy of baking and share your apple crisp experiences with friends and family. Whether you’re a seasoned baker or a kitchen novice, this homemade dessert welcomes everyone. Start your culinary adventure, get creative, and most importantly, enjoy every delicious bite of your apple crisp creation.
Remember, the best recipes are those made with love, shared with passion, and savored with pure delight. Your apple crisp is not just a dessert—it’s a celebration of simplicity, flavor, and home cooking.