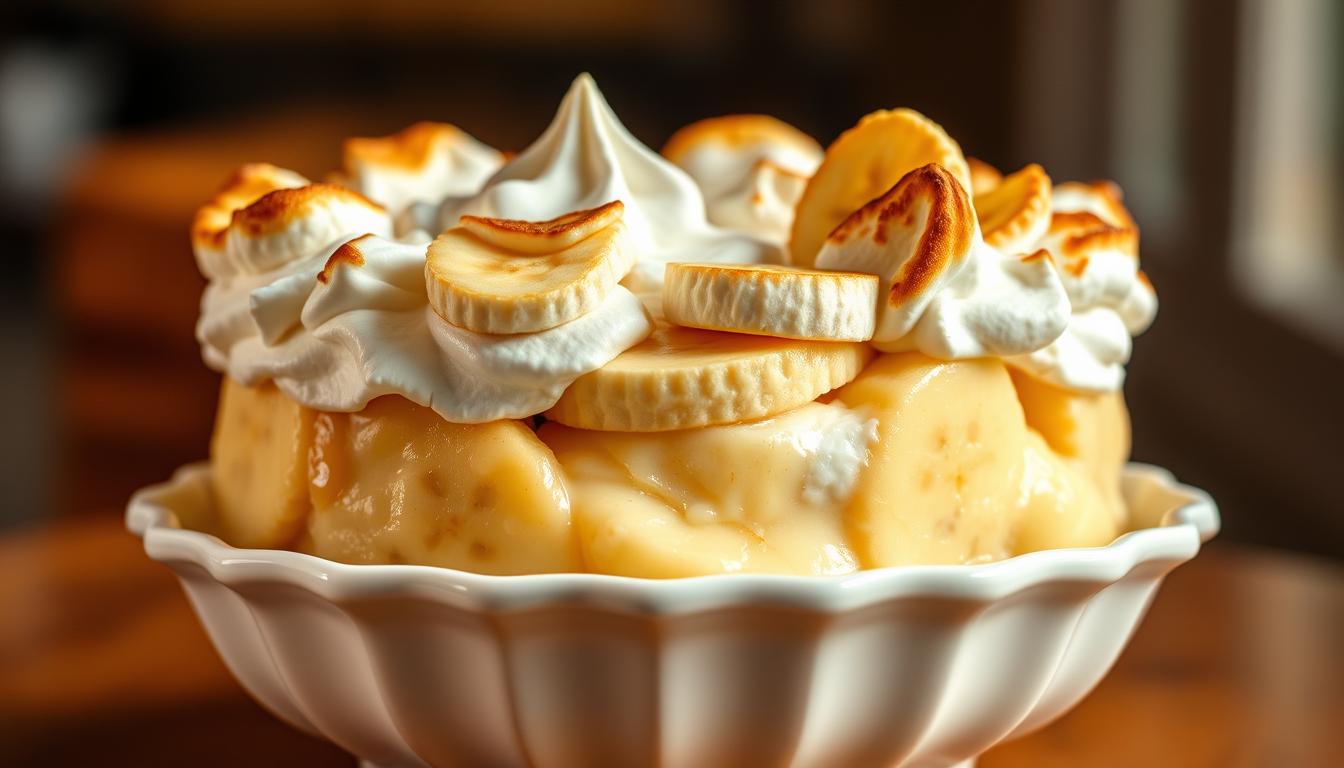
Growing up in Georgia, banana pudding was more than dessert—it was a family tradition. My grandmother would make it every summer. She layered bananas, vanilla pudding, and Nilla wafers in a vintage dish. It was a southern dessert that brought us together.
Making homemade banana pudding is easy. It turns simple ingredients into a comforting treat. Whether you’re an experienced baker or new to the kitchen, this dessert will warm your heart.
The beauty of banana pudding is its simplicity. It combines ripe bananas, creamy custard, and crunchy wafers. With just a few ingredients, you can make this beloved dessert at home.
Key Takeaways
- Banana pudding is a classic Southern comfort dessert
- Easy to prepare with minimal cooking skills
- Requires simple, readily available ingredients
- Perfect for family gatherings and potlucks
- Can be customized with personal touches
The History and Origins of Banana Pudding
Banana pudding is a beloved Southern dessert with a rich history. It started in American regional cooking and became a favorite in the South. Today, it delights people all over the country.
The story of banana pudding begins in the late 1800s. Bananas were just starting to be common in the U.S. Southern cooks turned them into a creamy, comforting dessert. It quickly became a regional icon.
Culinary Beginnings in the American South
The origins of banana pudding in the South are interesting. Early recipes mixed:
- Ripe bananas
- Vanilla custard
- Layered wafer cookies
- Whipped cream or meringue topping
Cultural Significance and Transformation
Banana pudding’s history is more than a recipe. It tells a story of innovation and comfort. Families shared recipes, adding their own special touches.
| Era | Banana Pudding Characteristics |
|---|---|
| Late 1800s | Simple custard-based dessert |
| Early 1900s | Introduction of packaged vanilla wafers |
| Mid-20th Century | Widespread popularity across Southern states |
| Modern Day | Gourmet and creative variations |
What started as a simple Southern dessert is now loved nationwide. Its journey shows how American food traditions evolve and grow.
Essential Ingredients for Perfect Banana Pudding
Making the perfect banana pudding starts with the right ingredients. This classic Southern dessert needs a mix of flavors and textures. It will make your taste buds happy.
Your main ingredients are:
- Ripe bananas (the key to natural sweetness)
- Nilla wafers (classic crispy base)
- Vanilla pudding mix (creamy foundation)
- Whole milk
- Heavy whipping cream
- Granulated sugar
- Eggs
- Vanilla extract
Nilla wafers are key in banana pudding. They add a nice crunch and soak up the pudding’s creaminess. Choose a top-notch vanilla pudding mix for a smooth, rich taste.
Pro tip: Pick bananas that are yellow with small brown spots. These ripe bananas will give your dessert the best flavor and sweetness. Make sure all your ingredients are fresh and at room temperature for the best mix.
Every ingredient adds something special to your banana pudding. The vanilla pudding mix makes it silky, while Nilla wafers add crunch. Ripe bananas bring a natural sweetness that makes the whole dessert better.
Kitchen Tools and Equipment You’ll Need
Making the perfect banana pudding is more than just using great ingredients. The right tools and kitchen equipment make the process smooth and fun. Before you begin mixing and layering, let’s look at the essential tools you’ll need.

Every home baker needs basic kitchen equipment for a tasty banana pudding. Your collection of tools should include:
- Large mixing bowls in various sizes
- Whisk for smooth custard preparation
- Rubber spatula for scraping bowls
- Measuring cups and spoons
- Sharp knife for slicing bananas
Optional Special Equipment
While not necessary, some special equipment can make your banana pudding even better. Think about getting:
- Electric hand mixer for easy custard mixing
- Trifle dish for elegant presentation
- Piping bag for decorative whipped cream topping
- Kitchen scale for precise ingredient measurements
Choosing the Right Storage Containers
Choosing the right containers is key to keeping your banana pudding fresh. Look for airtight containers with tight lids to keep odors out. Glass containers with tight lids are best for keeping the pudding’s texture and flavor.
Pro tip: Pick containers that are both useful and look good. They’ll help keep your banana pudding fresh and tasty for days.
Step-by-Step Preparation Guide
Making banana pudding is simpler than you might think. This guide will help you make a delicious dessert that will wow your family and friends.
To start, gather all your ingredients and tools. Getting ready is crucial for a smooth and creamy dessert.
- Prepare the Pudding Base
- Whisk together sugar, cornstarch, and salt in a saucepan
- Gradually add milk, stirring constantly
- Cook over medium heat until mixture thickens
- Create the Custard
- Temper egg yolks with hot milk mixture
- Return to pan and cook until very thick
- Remove from heat and add vanilla extract
- Layering Process
- Slice ripe bananas into thin rounds
- Layer vanilla wafers at the bottom of your dish
- Alternate layers of pudding, bananas, and wafers
Pro tip: Chill your banana pudding for at least 2 hours before serving to allow flavors to meld together.
| Ingredient | Quantity | Purpose |
|---|---|---|
| Whole Milk | 2 cups | Creamy base |
| Sugar | 1/2 cup | Sweetness |
| Egg Yolks | 3 large | Richness |
| Vanilla Wafers | 1 box | Texture |
| Ripe Bananas | 3-4 | Flavor |
The secret to perfect banana pudding is patience and attention to detail. Follow these homemade pudding instructions carefully, and you’ll create a dessert that’s sure to become a family favorite.
Tips for Selecting and Ripening Bananas

Choosing the right bananas is key for a tasty banana pudding. You need to know how to pick and ripen them just right. This is important for your dessert’s success.
When picking bananas, look for certain signs of ripeness. The color and feel of the banana are very important. They help decide if it’s good for your pudding.
Choosing the Perfect Ripeness
Knowing how to ripen bananas can make your dessert amazing. Here’s what to look for:
- Yellow bananas with small brown spots are ideal for pudding
- Avoid completely green bananas, which lack sweetness
- Pass on overripe bananas with extensive dark bruising
Storage and Ripening Methods
Here are simple ways to speed up or slow down banana ripening:
- Place bananas in a paper bag with an apple or tomato to speed up ripening
- Store unripe bananas at room temperature
- Refrigerate ripe bananas to pause the ripening process
Pro tip: For quick ripening, try baking unripe bananas. Bake them at 300°F for 15-20 minutes until the skin turns black. This makes them ready for pudding instantly.
By mastering these ripening tips, your banana pudding will always be full of sweet, creamy flavor.
Layering Techniques for Beautiful Presentation
Making stunning banana pudding layers is an art. It turns a simple dessert into a visual masterpiece. Your dessert presentation tips start with understanding the strategic approach to trifle layering.
The key to perfect banana pudding layers is precision and visual appeal. Start with a clear glass dish that showcases each delicate layer. Your goal is to create a dessert that looks as incredible as it tastes.
- Start with a thin layer of vanilla wafer crumbs at the bottom
- Add a smooth layer of creamy pudding
- Place fresh banana slices in an overlapping pattern
- Repeat layers, ensuring each is even and distinct
- Top with whipped cream and crushed wafers for texture
When mastering trifle layering, consider these professional dessert presentation tips:
- Use a piping bag for precise pudding layers
- Chill between layers to maintain clean boundaries
- Cut bananas just before layering to prevent browning
Pro tip: Choose a clear container that allows your banana pudding layers to shine. The visual impact of perfectly arranged layers can elevate your dessert from good to extraordinary.
Common Mistakes to Avoid When Making Banana Pudding
Making banana pudding can be tricky. It needs attention to detail and knowing common problems. Whether you’re new to baking or have experience, knowing how to fix issues will help you make a great dessert every time.
Fixing dessert texture problems starts with knowing common issues. Let’s look at the main problems and how to solve them.
Texture Troubles and Quick Fixes
The pudding’s consistency is key for a great banana pudding. Here are common texture problems and how to fix them:
- Lumpy pudding: Whisk constantly while cooking to prevent clumping
- Runny texture: Ensure proper cornstarch measurement and cooking time
- Grainy pudding: Use a fine-mesh strainer when cooking to remove lumps
Temperature and Timing Challenges
Temperature control is crucial for banana pudding success. Your storage tips should include careful cooling and assembly:
- Cool pudding to room temperature before layering
- Refrigerate immediately after assembly
- Avoid leaving at room temperature for extended periods
Smart Storage Strategies
Proper storage is key for your banana pudding’s quality. Here are expert tips to protect your dessert:
| Storage Method | Duration | Best Practices |
|---|---|---|
| Refrigerator | 2-3 days | Cover with plastic wrap directly touching pudding surface |
| Room Temperature | 2 hours max | Keep away from direct sunlight and heat sources |
Pro tip: Bananas oxidize quickly, so add fresh banana slices just before serving to maintain their bright color and fresh flavor.
Variations and Creative Twists
Turn your classic banana pudding into a fun kitchen adventure with these new twists. You don’t need to make it complicated. Simple changes can make a big difference.
Try these pudding flavor twists to change up your dessert game:
- Chocolate Lover’s Dream: Mix in cocoa powder or melted chocolate for a chocolatey banana treat
- Tropical Coconut Fusion: Use coconut milk and toasted coconut flakes for a tropical twist
- Nutty Crunch Edition: Add chopped nuts like pecans, almonds, or walnuts for extra texture and taste
If you follow special diets, banana pudding can still be enjoyed. Here are some options:
- Gluten-free versions with different cookie bases
- Dairy-free versions using coconut or almond milk
- Vegan options with plant-based ingredients
Feel free to try different cookies instead of vanilla wafers. Graham crackers, shortbread, or chocolate chip cookies can add new flavors. The goal is to keep it creamy while introducing exciting new tastes.
Conclusion
Making homemade banana pudding is more than just a dessert. It’s about creating a piece of Southern comfort food that brings people together. This easy recipe turns simple ingredients into a treat that brings joy to any gathering.
Your journey into banana pudding is an invitation to explore a culinary tradition. It speaks to both heart and palate. Whether you’re new to cooking or have experience, this classic dessert has something special for everyone. The creamy pudding, fresh bananas, and crisp vanilla wafers create a symphony of flavors that embodies comfort and warmth.
As you learn to make banana pudding, you’ll find it’s more than a recipe. It’s a connection to family traditions and Southern culinary heritage. Each spoonful tells a story of home-cooked meals and cherished moments. Feel free to experiment and add your own touches to make it your own.
Embrace the simplicity and deliciousness of homemade banana pudding. It’s a versatile dessert that can brighten any occasion. Your skills will surely impress friends and family, creating delicious memories one layer at a time.